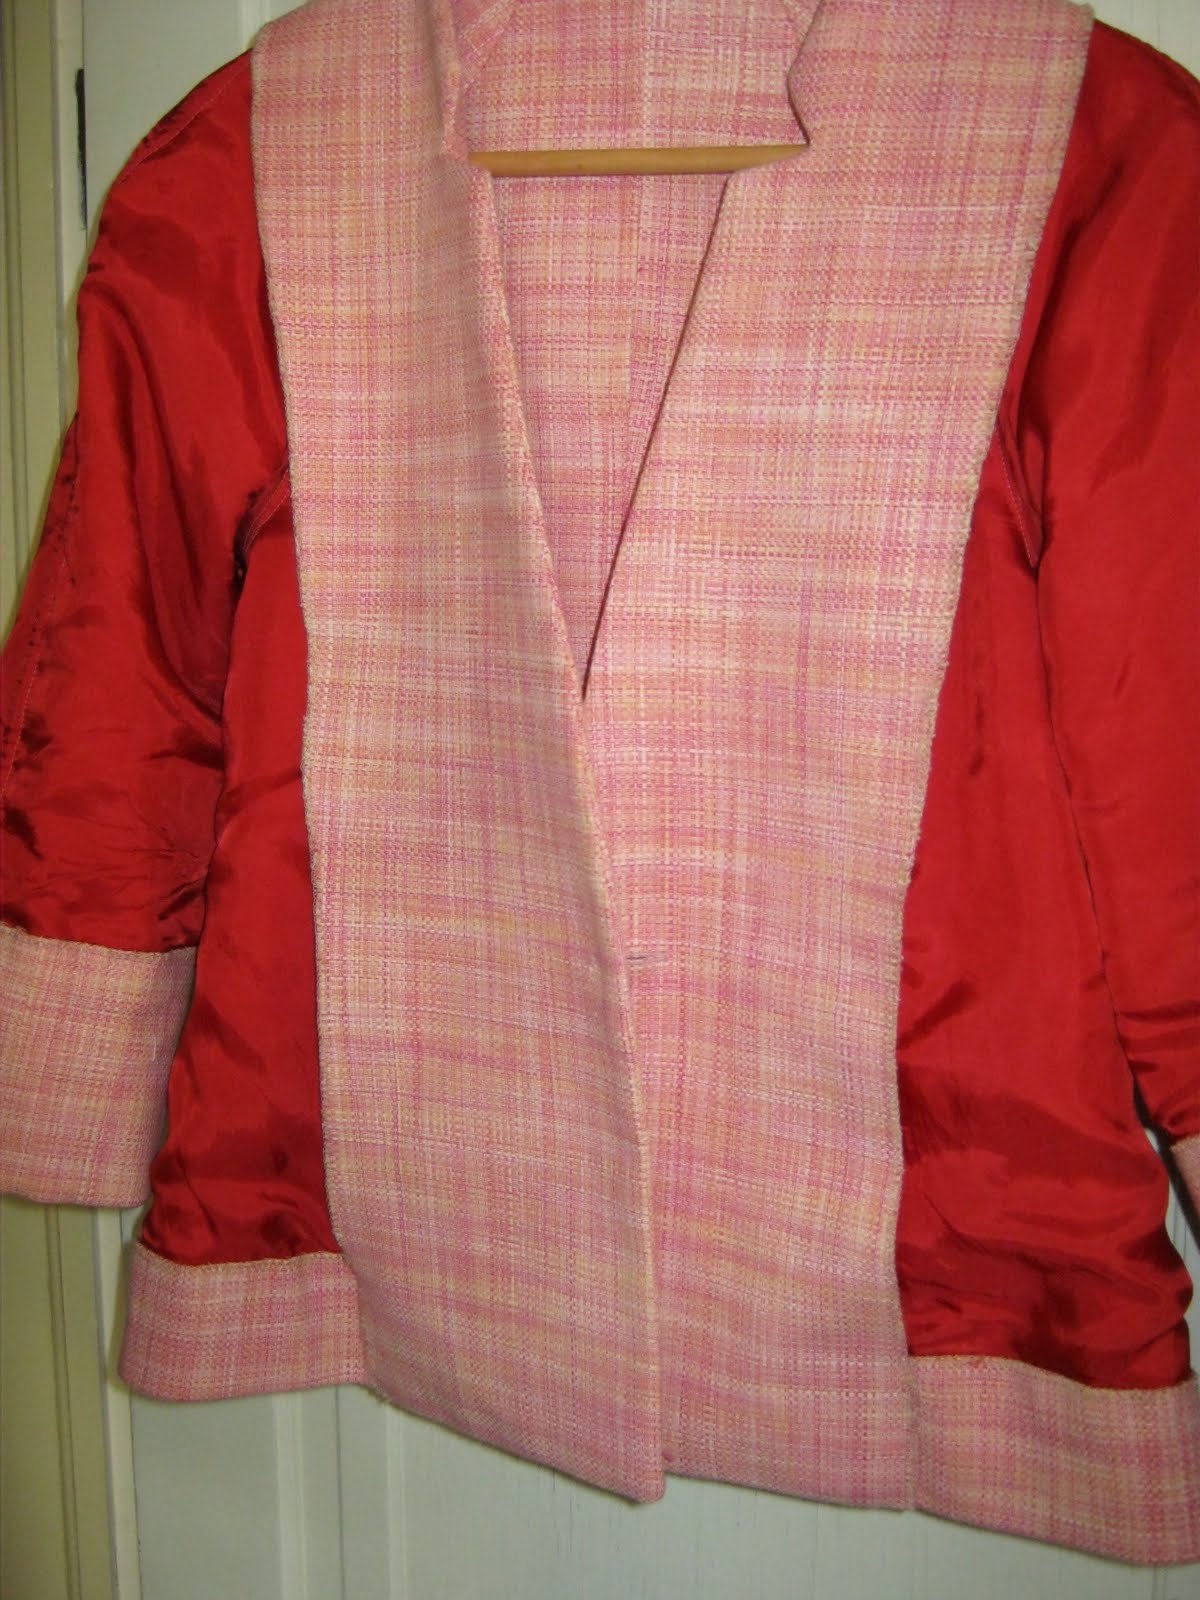
Happy Mother's Day! It's a gorgeous spring day in Maryland, perfect for wearing my new jacket and bringing flowers from the yard to our Flower Communion service at my Unitarian Universalist church this morning. The stitch and flip jacket technique that I used on this jacket worked out quite nicely. It's fully lined but since the lining is treated almost like an underlining, it makes for a comfortable, almost sweater-like jacket. I've used this technique on other jackets in recent years and can't rave enough about how well it works. There are some limitations but overall it's the best way for me to wear a lined jacket but live in a warm climate almost year round. Yes, it's a repeat pattern, Simplicity 3884, now officially a TNT pattern since this is my second version.
As for the flower pin I'm wearing, that came from a fun NYC garment district visit to M&S Schmalberg who use old wooden "stencil" molds to create custom flowers for designers and individuals. WSJ article on M&S Schmalberg It's actually a rather reasonable expense to have them custom make flowers from your own fabric. If I were planing a wedding or special anniversary outfit, I would definitely look into having them create custom coordinated flowers....imagine a small corsage of bridal lace as a sentimental way to keep your wedding dress lace as an everyday accessory.
For those of you super curious, here's the inside of the stitch and flip jacket...after a full day's wearing. A little wrinkled but uber comfy:
Hope it's been a good day for you, wherever you live.
Showing posts with label Simplicity 3884. Show all posts
Sunday, May 8, 2011
Wednesday, April 27, 2011
JAM #4 in Progress...a Stitch and Flip Version of S 3884
A year this month Shannon Gifford, the wonderful sewing teacher I met through Patternreview, passed away far, far too soon in her life. I'm using her technique of stitch and flip lining to make my 4th Jacket a Month this year. I am using a new TNT pattern, Simplicity 3884, this time with a lightweight pink, fuschia, tangerine and gold tweed cotton/silk blend from Fabric Mart.
Shannon wrote about this technique Threads 111 issue: Line and Underline in One Step article so I'm not sharing any state secrets with my pictures:
One of the interesting things about this method is that you cut an exact copy of the garment body pieces out of fashion fabric and out of the lining....no separate set of lining pieces. You don't cut a lining for the front pattern piece if you have a facing for the pattern, which I do for this jacket.
I decided to interface all of the jacket pieces with lightweight knit interfacing, also from Fabric Mart. I used Fusi Knit on the front and neck facing and that may be a little too much interfacing happening....we'll see how the final jacket presses.
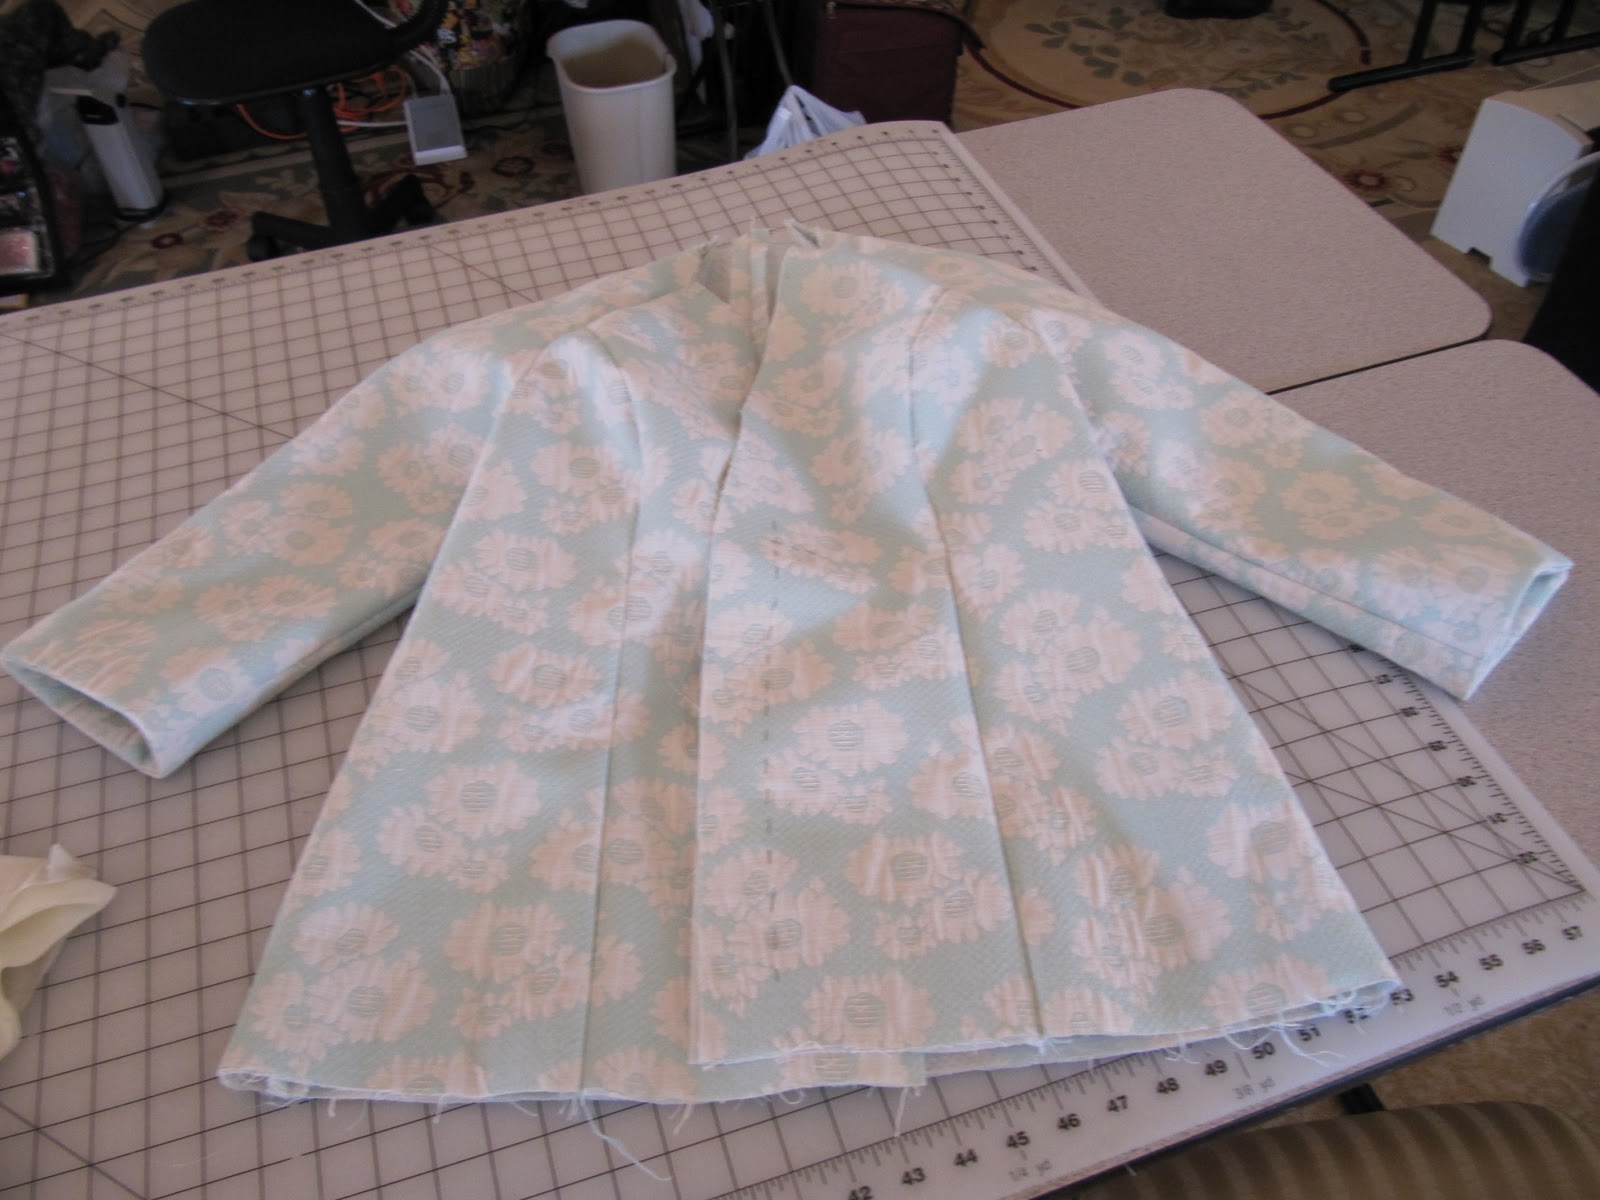
This technique has you sew a stack of pieces, two fashion fabrics, right sides together as well as the two lining pieces. Press the seam, trim it to 1/8-1/4" then topstitch from the fashion fabric side nd stitch the lining into place at the same time. By doing that top stitching with a thick but trimmed seam, there's a sort of seam structure built into the garment. But it's also why you have to use a TNT fitted pattern for this technique since alterations are not easy to accomplish. It's not just for jackets. I think it would be wonderful to make a pencil skirt this way.
Only one seam of a two seam sleeve can be topstitched so I chose the upper arm raglan seam for that treatment.
This is about as far as I've gotten this week. Our new air conditioning unit from last August gave out and a new compressor is getting installed tomorrow. So it's terribly hot in my sewing space after using my Singer press to fuse interfacing and then pressing this jacket as I sew. Sort of my own luxury sweatshop here in SW Florida.
In the meantime, I hope more of you look longingly at those vintage Vogue patterns I'm giving away next week. They'll be leaving home one way or another;-)
Shannon wrote about this technique Threads 111 issue: Line and Underline in One Step article so I'm not sharing any state secrets with my pictures:
One of the interesting things about this method is that you cut an exact copy of the garment body pieces out of fashion fabric and out of the lining....no separate set of lining pieces. You don't cut a lining for the front pattern piece if you have a facing for the pattern, which I do for this jacket.
I decided to interface all of the jacket pieces with lightweight knit interfacing, also from Fabric Mart. I used Fusi Knit on the front and neck facing and that may be a little too much interfacing happening....we'll see how the final jacket presses.
This technique has you sew a stack of pieces, two fashion fabrics, right sides together as well as the two lining pieces. Press the seam, trim it to 1/8-1/4" then topstitch from the fashion fabric side nd stitch the lining into place at the same time. By doing that top stitching with a thick but trimmed seam, there's a sort of seam structure built into the garment. But it's also why you have to use a TNT fitted pattern for this technique since alterations are not easy to accomplish. It's not just for jackets. I think it would be wonderful to make a pencil skirt this way.
| Inside seam of my center back |
| Outside topstitched seam |
| Two piece sleeve before turning |
This is about as far as I've gotten this week. Our new air conditioning unit from last August gave out and a new compressor is getting installed tomorrow. So it's terribly hot in my sewing space after using my Singer press to fuse interfacing and then pressing this jacket as I sew. Sort of my own luxury sweatshop here in SW Florida.
In the meantime, I hope more of you look longingly at those vintage Vogue patterns I'm giving away next week. They'll be leaving home one way or another;-)
Tuesday, February 1, 2011
Jacket A Month, JAM #1
| Simplicity 3884 and Lucky |
Pattern Description: Simplicity's description: Lined Dress or Top, Pants in Two Lengths, Jacket
My description: Shapely raglan sleeved unlined jacket with neckline detail in wide size range
Pattern Sizing 6-22
Did it look like the photo/drawing on the pattern envelope once you were done sewing with it? Yes, only I think my neckline detail is more obvious than theirs.
Were the instructions easy to follow? Yes, whenever I decided to use them.
What did you particularly like or dislike about the pattern? Three years ago I was sitting at an ASG fashion show and admiring the jacket that one of women had made. Of course it was an out of print Burda pattern but fortunately for me Simplicity came out with their spring catalog immediately afterward and this jacket is a near clone of the jacket I admired. I bought the pattern at the next sale and even made my first muslin of this jacket that spring. Then I just hung it up in the "muslin closet." I was hoping to avoid my usual alterations and of course that's just not possible unless I wear a caftan. I had a bunch of tweaking to do so it sat for two years.
I sewed that second muslin in time to decide that this jacket would be one of my sewing retreat projects in January and my first Jacket a Month project.
I like the lines of it, the neckline detail and the sleeve slits. I dislike that there's no lining.
Fabric Used A cotton matelasse, totally fused with the 60" knit interfacing from Fabric Mart then Hong Kong finished seams on the inside with a silk dupioni from JoAnns home dec remnants.
Pattern alterations or any design changes you made Ok, here's the tweaking list:
FBA of 1/2 ", hollow upper chest meant that I had to remove fabric in the front raglan sleeve and princess seam area. I did not have to do my usual upper arm widening not did I do a sway back.
I did shorten the sleeves to 3/4 to avoid that one horizontal line when sleeves and hems are the same length.
I'm twisting in this picture but wanted to get a shot of the nicely curved center back seam.
Would you sew it again? Would you recommend it to others? I will definitely be using this pattern again.
Conclusion: Nice lines, great start to my year of the jacket. Here's a better closeup so you can see the princess seams and front detail.
As I mentioned in the review, one of the most frustrating parts of this project was that there was no provision for a lining. It was a royal pain to decide to bind all of those seams AFTER I had sewn the entire body and sleeves of the jacket. Much simpler to bind the sam edges when they are flat, as I did with the facings. My enthusiasm for attending the sewing retreat kept me from really thinking through the lining challenge.
I did want to show my two favorite Viking sewing feet for sewing those yards and yards of bias silk dupioni. First pass I use my edge stitching foot to sew the 1 1/2" bias strip to the outer edge of the seam. The metal lip is to the right and I keep it touching the two fabric edges.
| Lining up the metal flange for accurate stitch in the ditch sewing from the front of my machine |
Second pass (after pressing the strip around the edge to the back) I use the edge joining foot to stitch in the ditch. I've learned that the secret to this foot is to watch the metal flange piece and keep it right "in the ditch" and not to look at the needle. If the metal lip is in the ditch, then my stitch will disappear into that ditch as well.
| From the back of my machine, stitch in the ditch is virtually invisible |
On the home front, Lucky is in day 12 of his heartworm treatment and doing just great. He was coughing and gagging starting day 7 but that seems to be subsiding as the dead worm makes its way through his heart, lungs and body. The two dogs are making nice while we keep them from playing. It will be so great when the activity quarantine ends.
Wednesday, January 26, 2011
Simplicty 3884, the 1st JAM in Progress
| Simplicity 3884 |
My first one presented me with a challenge when I was sewing it at the sewing retreat last weekend. The jacket pattern is a raglan sleeve pattern and unlined. I wanted a lined pattern. I cut out a lining using all the pattern pieces. I figured I would use the front and back facings from the pattern and sew the lining directly to them. Whoops, not really going to work. That idea works nicely on a set in sleeve unlined jacket. But not so nicely on a raglan sleeve jacket with all those extra seams at the shoulder and neckline.
| Attempted lining pieces |
| Whoops, facings not designed for that lining! |
So rather than reinvent the wheel at this stage, I'll go along with Simplicity's plan. I'm binding the seams with silk dupioni and will wear it as a lightweight unlined jacket. If I make it again, perhaps I'll do the stitch and flip technique or simply underline the whole jacket in Ambiance to have that cool lining feeling.
Subscribe to:
Posts (Atom)